More than 20 years ago, a small company named Edgewater Fly Co. started producing all kinds of foam heads for poppers and other flies. In one of the first fly fishing shows, we met its owner Steven George Shiba, who came from the finance world and also loved fly fishing coming up with many new ideas View more...More than 20 years ago, a small company named Edgewater Fly Co. started producing all kinds of foam heads for poppers and other flies. In one of the first fly fishing shows, we met its owner Steven George Shiba, who came from the finance world and also loved fly fishing coming up with many new ideas. Soon enough Edgewater Fly Co. developed all sorts of foam components that us tyers could use creatively to create flies and actions.
I’ve always had fun with the flies from the 50s and 80s that resemble spinning and bait casting lures. Delicate creations in cork and balsa wood that were easy to cast. We have to remember that in the 50s, the early spinning gear was marketed as the next step after fly fishing because most anglers started with fly fishing. Spinning reels were seen as a true evolution. But spinning never replaced fly fishing in the end, and fly fishermen designed artificial lures of all kinds, imitating the Heddon and Creek Chub ones, light, small, and able to be cast with a fly rod. In those times these lures were considered heretic, but today we all use flies that nor Halford or Skues would have accepted, but these can be cast perfectly and allow us to go for new species.
Edgewater Fly Co. made the task of shaping cork or wood a lot easier with its foam heads and bodies. One of the models was the Wiggle Bug, designed by Larry Tullis from Utah. A great action fly. It works like the Flatfish lure and adapts to various stripping ways. Its very simple and does not fail if we follow the tips that follow here.
Sadly, Steven G. Shiba passed away at age 39 and the Edgewater products vanished from the market, although several companies do similar stuff today.
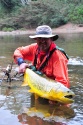
I use this fly for wolf fish, so I modified the original design that lasted too little because of those jaws. I altered the way of tying it, left some materials out, and added epoxy and cianoacrilate. Instead of chenille I use synthetic hackle for the belly and it makes the fly work closer to the surface. The original one swims deeper, it was made for bass and trout.
For the body I use EVA rubber of 2mm, glued together with the 3M Super 77 glue. For a model tied with a 3/0 hook we’ll need a 6mm rubber layer as a maximum. We can combine up to 3 colors. Thinner rubber layers get tangled. We can use 5 or 6 mm rubber layers in one only color too. I like to combine colors, although wolf fish like single colors like chartreuse, white or black too.
The basic design can be altered considerably to make frogs or mice. If you want to use this fly for strong currents, its best to make a slim profile, centering the foam correctly.
Foam can be easily painted with acrylic paints and can be covered in epoxy too, although it makes it heavier to cast. This particular one is lightweight, in 3/0 size we can easily handle it with a #8 line. Its key to let the fly reach the surface before taking it out of the water before the back cast. We have to tie it with a loop knot so it moves and vibrates, then play with the rod tip and the line. Use short strips as the ones for poppers, or try long ones as used for divers. It does not get tangled much and without a barb we’ll easily take it out of the fish without touching them or breaking the fly.
Move the mouse over the image to zoom in the fly.
Touch the image to zoom in the fly.

List of materials
HOOK: OWNER 5103 or preferably a hook that has a long shank with a horizontal eye of the hook. The same hook that is used for rubber worms when fishing for bass can also work. There are similar hooks that Mustad, Partridge and other brands do. Some of these hooks come with two barbs on the leg to be crushed before tying the fly.
THREAD: Use a transparent nylon thread for the body and for attaching the rear of the foam. GSP or VEEVUS thread 210 denier.
BELLY: Krystal Hackle large pearl View more...
HOOK: OWNER 5103 or preferably a hook that has a long shank with a horizontal eye of the hook. The same hook that is used for rubber worms when fishing for bass can also work. There are similar hooks that Mustad, Partridge and other brands do. Some of these hooks come with two barbs on the leg to be crushed before tying the fly.
THREAD: Use a transparent nylon thread for the body and for attaching the rear of the foam. GSP or VEEVUS thread 210 denier.
BELLY: Krystal Hackle large pearl.
BACK: EVA Foam 5 or 6 mm thick, 1.3 cm wide for a 3/0 hook. The length of the strip must pass the bend of the hook from the eye to avoid being short.
EYES: 3D 6mm glued with epoxy.
Steps
Step 1
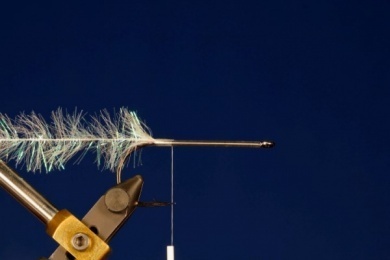
We apply a thin layer of cyanoacrylate cement on the hook along with a thin transparent nylon thread until the end of the shank and start of the curve. Just before the curve tie in some Krystal Hackle which we will use to form the belly. The transparent nylon thread that we use must be around 0.08mm thick. The cyanoacrylate cement combined with the nylon thread creates a basis that prevents rotation and gives the fly more integrity. View more...We apply a thin layer of cyanoacrylate cement on the hook along with a thin transparent nylon thread until the end of the shank and start of the curve. Just before the curve tie in some Krystal Hackle which we will use to form the belly. The transparent nylon thread that we use must be around 0.08mm thick. The cyanoacrylate cement combined with the nylon thread creates a basis that prevents rotation and gives the fly more integrity.
Step 2
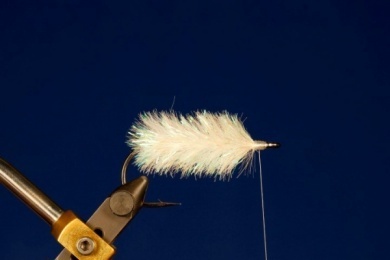
We wrap the nylon thread up back up the shank to the eye of the hook and cover the shank with epoxy. Wrap the Krystal Hackle up the shank to the eye of the hook and tie it off. Wait for the cement to dry for 5 minutes. Leave some space behind the eye of the hook for the foam. Form the head with a little taper to create a nice fit and finish with a little cement to make it firm.
Step 3
Combine the foam of 3 colours and make a 45 degree cut on the tip. Use a extremely sharp tool to create a clean cut.
Step 4
I use a scerwdriver or a needle to put a hole in the foam and make the hole at a 90° angle. For a 3/0 hook I leave 1.3 to 1.5cm of space, centering the hole in the foam is key for the correct action of the fly.
Step 5
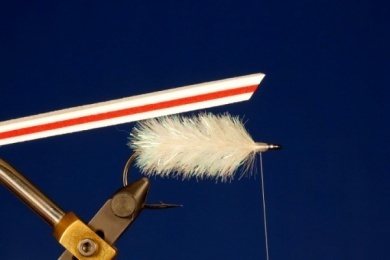
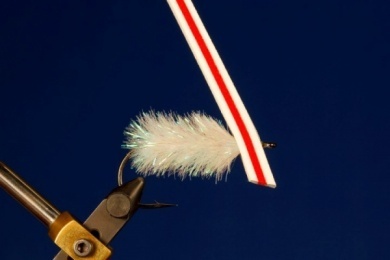
Add another layer of cyanoacrylate cement on the head and insert the foam. I tilt the vise to do this carefully as it allows me to get a better view. Depending on the angle of inclination of the foam will make the fly swim higher or deeper in the water.
Step 6
We tie in the foam back using the GSP 210 denier yarn, cementing with a touch of cyanoacrylate. Then tie down firmly compressing the foam as much as possible without breaking the thread. Use thick thread and flat, with fine kevlar. We check the centering of the foam and close with a whip finish, cutting the excess thread, and cementing immediately with a touch of cyanoacrylate. Then we cover the tie with a thin layer of epoxy and leave to dry for 5 minutes.
View more...We tie in the foam back using the GSP 210 denier yarn, cementing with a touch of cyanoacrylate. Then tie down firmly compressing the foam as much as possible without breaking the thread. Use thick thread and flat, with fine kevlar. We check the centering of the foam and close with a whip finish, cutting the excess thread, and cementing immediately with a touch of cyanoacrylate. Then we cover the tie with a thin layer of epoxy and leave to dry for 5 minutes.
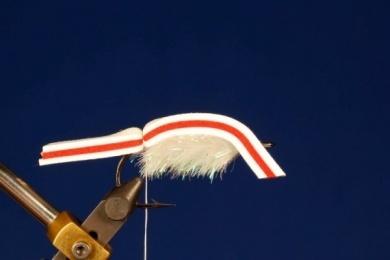
Step 7
We cut the excess foam as shown in the photo. The rear tip gives the fly better as Zig Zag action.
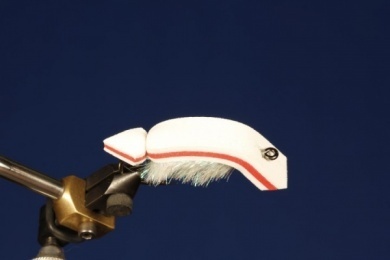
Step 8
Attach the 3D eyes, to each side with a touch of epoxy and wait 5 minutes as shown in the photo.
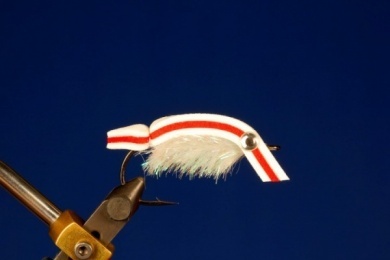
Step 9
The completed fly from below.
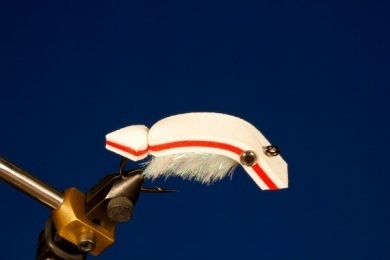
Step 10
The completed fly from above.