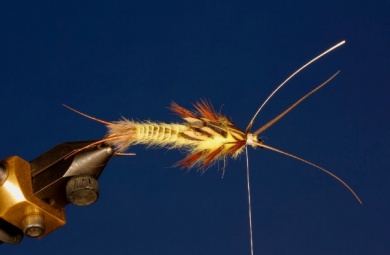
Many of you have probably experimented with the effectiveness of the flies with bodies made with quills, using for example peeled peacock quills in their natural or dyed color.
The attractive color of the peacock quill, with its dark stripe followed by a lighter one on degrade makes it a perfect el View more...Many of you have probably experimented with the effectiveness of the flies with bodies made with quills, using for example peeled peacock quills in their natural or dyed color.
The attractive color of the peacock quill, with its dark stripe followed by a lighter one on degrade makes it a perfect element to make a natural abdomen in endless flies, but it has a problem: its width is not for bigger flies and it is even, we can get great segments with it but not the cone shape or the segments that get thicker in the abdomen.
Where then can we find quills with correct length, width or cone shape to tie, for example, large stoneflies? The answer is simple, it comes from tyers of the XIXth century, who used quills taken from wing feathers of ducks, goose and others using a fairly simple method that produces quills of the correct length and also translucent, so we can color and dye them.
In the 70s, Ted Niemeyer, a very fine tyer used this kind of quills to create very interesting models for an angler that was interested in impressionistic flies and very attractive for trout.
To obtain the quills easily the first thing to do is to get a good lot of feathers of a duck’s wing for example, especially the primary and secondary ones in the wing. These have to be put in hot water with some spoonfuls of detergent and left at least for 24 hours so that the cuticle that covers the main quill of the feather softens.
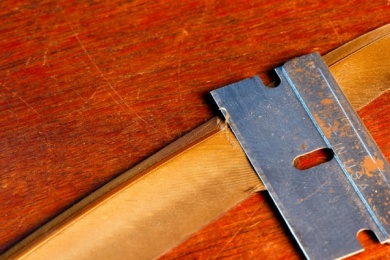
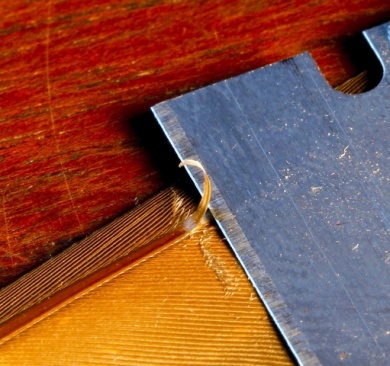
After the 24 hours soak, lift a barb of the central raquis with a very sharp blade (as seen in the picture). We can get a strip at each side of the feather, but the best one can be obtained from the convex side of the raquis or the top side of the feather. Once we lift the barb, take it with forceps and pull evenly away and down. It will loosen from the upper layer of the raquis, completely, and we’ll have a conical tape, pretty translucent, with clear color stripes.
Once we have several of thes quills, we can improve its transparency by scraping softly the inner side until the pith, the white spongy substance, on the darker side is loosened.
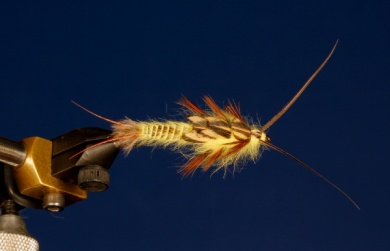
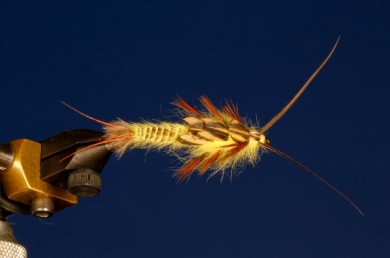
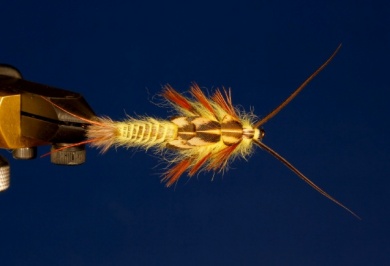
These quills, in comparison with the peacock ones, are much more resistant, conical and long, allowing us to tie on larger hooks. Today’s nymph is on a size 4 long-shank hook.
Once we are familiar with the system to obtain this type of quills we can do the same for almost every feather, we just have to experiment but it is worth the try, for we will get a natural quill that can’t be imitated by any synthetic quill.
Move the mouse over the image to zoom in the fly.
Touch the image to zoom in the fly.

List of materials
Hook: Mustad 9575, size 4.
Thread:
8-0 white.
Tail: pheasant aftershaft and peeled feather raquis from the neck of a pheasant, dyed brown with permanent marker.
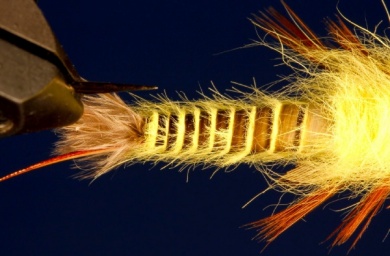
ABDOMEN: yellow rabbit dubbing, ribbed with a conical quill of a duck’s wing. Below the abdomen goes a lead carcass, as thick as the hook.
THORAX: yellow rabbit dubbing.
LEGS: fibers from the pheasant tail or neck feather.
WINGCASES and PRONOTUM: feathers from the ring necked pheasant, burned with stonefly wingburn View more...Hook: Mustad 9575, size 4.
Thread:
8-0 white.
Tail: pheasant aftershaft and peeled feather raquis from the neck of a pheasant, dyed brown with permanent marker.
ABDOMEN: yellow rabbit dubbing, ribbed with a conical quill of a duck’s wing. Below the abdomen goes a lead carcass, as thick as the hook.
THORAX: yellow rabbit dubbing.
LEGS: fibers from the pheasant tail or neck feather.
WINGCASES and PRONOTUM: feathers from the ring necked pheasant, burned with stonefly wingburner, and lacquered with flexible cement.
HEAD: yellow rabbit dubbing and ring necked pheasant feather on top.
ANTENNAE: turkey or goose biots, longer than the tails.
Steps
Step 1
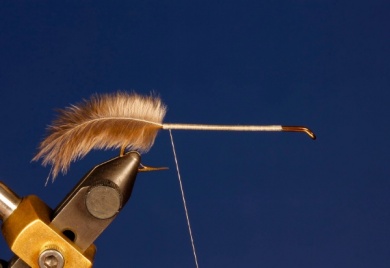
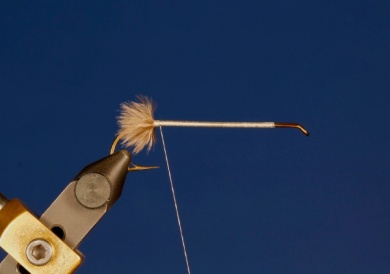
Tie an aftershaft, the feather we find between the base of the neck or back of the pheasant. It does not necessarily have to be from a ring-necked pheasant or pheasant itself. We can even use an ostrich feather with long fibers.
Step 2
Carefully because they are delicate, wrap 3 or 4 turns with the aftershaft combing the fibers to the back.
Step 3
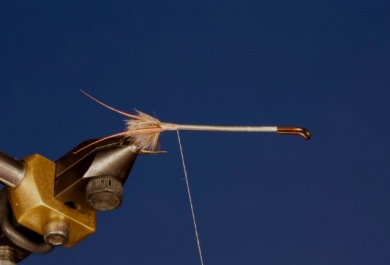
Tie a tail at each side. You can make it by peeling feather from the neck of the ring necked pheasant, the purplish ones. You have to dye them with marker to mark the reticle after peeling. These raquis have the exact conical shape similar to the tails of natural stoneflies.
Step 4
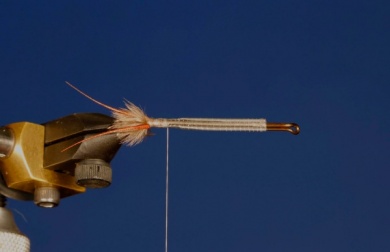
Place two strips of lead to shape the abdomen. Before tying it, refine the tips that will point to the tail.
Step 5
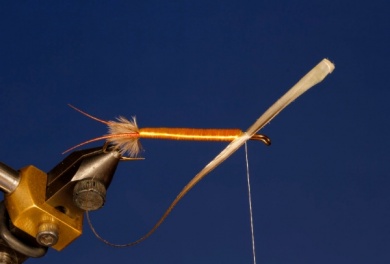
Tie the thin part of the quill on the back, use yellow floss to cover the lead and shape the abdomen.
The picture shows the quill held on the front by the thread, only so you can see its characteristics.
Step 6
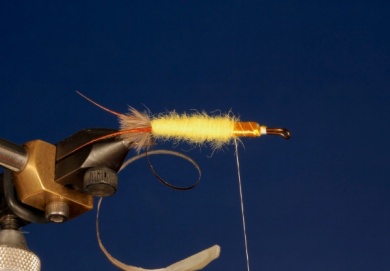
Cover the floss with a thin layer of yellow rabbit dubbing.
Step 7
Wrap the quill combing it to the back at the same time as the dubbing to expose some fibers and add character to the abdomen. Use some more dubbing to shape the thorax.
Step 8
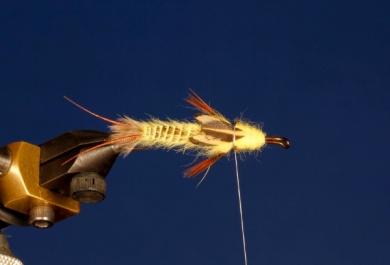
Tie the first pair of legs with pheasant fibers and then place the first wingcase.
Step 9
Add more dubbing, then the legs, and finally the wingcase.
Step 10
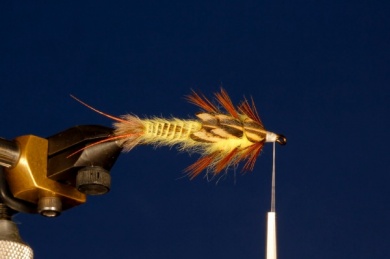
Shape the last segment of the thorax with dubbing, add the last pair of legs and the pronotum on top, leaving space for the head and antennae.
Step 11
Use dubbing to make a base for the antennae, tie them, then use a lacquered pheasant feather to make the back side.
Step 12
Use some more dubbing for the head and lower the pheasant feather tying it between the antennae, where then we will place more dubbing and close with a good knot.
Step 15
The abdomen seen from below.
Step 16
The correct way to obtain the quill.
Step 17
The correct way to obtain the quill.

